
With a specific client application, we had to apply the customer’s “brand” font for all controls of the UI. It was quite a custom project, a heavily branded UI request. Seems to be a common enough font request right? Yeah, I was thinking the same. But then I was surprised that Android doesn’t provide simple and elegant way to do this.
So, in this blog post, I’ll show you what option we have by default on Android, and then my answer below. It’ll allow you to apply your own custom fonts in a more simplified and and refined way.
OK, the situation: you have a custom font that should be applied for entire application screen.
The solution:
1) Android’s default #1:
You can refer by id view controls, and apply typeface for each of them:
1 2 3 | Typeface customFont = Typeface.createFromAsset(this.getAssets(), "fonts/YourCustomFont.ttf"); TextView view = (TextView) findViewById(R.id.activity_main_header); view.setTypeface(customFont); |
But in the case of many TextView, Buttons, etc… you’ll not be too happy with this way of work, I promise you.
2) Android’s default #2:
You can also create a specific subclass for each component i.e. TextView or Button, and then apply your custom font to the constructor:
1 2 3 4 5 6 7 8 9 10 11 12 13 14 15 16 17 18 19 | public class BrandTextView extends TextView { public BrandTextView(Context context, AttributeSet attrs, int defStyle) { super(context, attrs, defStyle); } public BrandTextView(Context context, AttributeSet attrs) { super(context, attrs); } public BrandTextView(Context context) { super(context); } public void setTypeface(Typeface tf, int style) { if (style == Typeface.BOLD) { super.setTypeface(Typeface.createFromAsset(getContext().getAssets(), "fonts/YourCustomFont_Bold.ttf")); } else { super.setTypeface(Typeface.createFromAsset(getContext().getAssets(), "fonts/YourCustomFont.ttf")); } } } |
We can then apply the custom views instead of normal ones (that is: BrandTextView instead of the TextView).
1 |
Also, you can even apply your own specific attributes to set the required font directly via XML. To do this, you’ll need to first define your own attributes and parse these attributes in the constructor.
The solution #2 is not too bad and has its own advantages, personally, it’s still too heavy and involves a lot of boilerplate code for a reasonably easy feature of a custom font.
3) Option #3 – My solution 😉
The perfect solution would be to define a specific theme or skin element and apply it to the Activity. Regrettably, Android’s android:typeface attribute can only use the built-in fonts, but not the custom fonts (i.e. the assets). This is the reason we can’t move away from loading fonts at runtime in Java code. So we decided to create a helper class to make it easier. Here is it in use:
1 | FontHelper.applyFont(context, findViewById(R.id.activity_root), "fonts/YourCustomFont.ttf"); |
This single string will apply the custom font for all your TextView based controls, disregarding the layout you use.
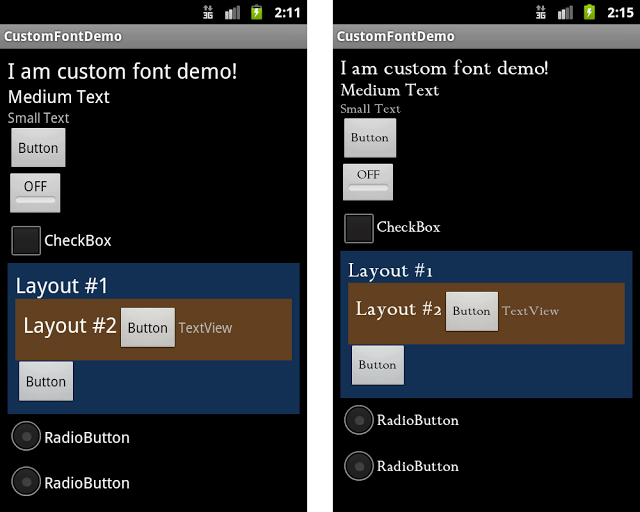
Standard font before (left) and custom font after (right)
How this was done? Fairly simple:
1 2 3 4 5 6 7 8 9 10 11 12 13 | public static void applyFont(final Context context, final View root, final String fontName) { try { if (root instanceof ViewGroup) { ViewGroup viewGroup = (ViewGroup) root; for (int i = 0; i < viewGroup.getChildCount(); i++) applyFont(context, viewGroup.getChildAt(i), fontName); } else if (root instanceof TextView) ((TextView) root).setTypeface(Typeface.createFromAsset(context.getAssets(), fontName)); } catch (Exception e) { Log.e(TAG, String.format("Error occured when trying to apply %s font for %s view", fontName, root)); e.printStackTrace(); } } |
Finally, download the sample code project with the usage of the FontHelper here.
Thanks for reading,
Darren.